Identifying and Assessing the Damage
When your kitchen countertop cracks, the first step is to assess the damage accurately. The way you approach the repair largely depends on the type and extent of the crack. Here’s a detailed guide to help you understand the various types of cracks and what they mean for your countertop.

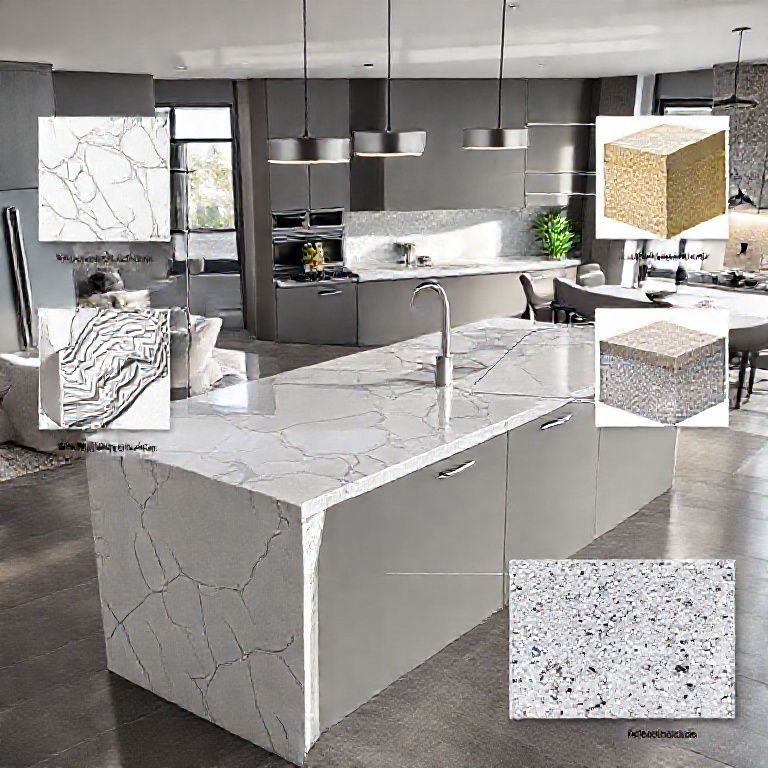
Types of Cracks
1. Hairline Cracks Hairline cracks are subtle and narrow. These are often the first signs of stress or aging in your countertop. They are usually minor and less visually disruptive.
2. Wide Cracks Wide cracks indicate more severe damage. They can be straight, jagged, or even spider-web like. These cracks are often more noticeable and can compromise the structural integrity of the countertop.
3. Chips and Splinters Chips and splinters are small cracks that result from impact or rough handling. They typically occur on the edge of the countertop and can be more challenging to repair because of their irregular shape.

Causes of Cracks
Cracks can occur due to various reasons, including:
Thermal Stress: Rapid temperature changes can cause materials like granite and quartz to crack. Physical Impact: Dropping heavy objects or using sharp tools can lead to cracks. Material Degradation: Natural aging and wear can weaken the material over time. Installation Issues: Poor installation or misalignment can cause cracks in the seams or joints.
Assessing the Extent of Damage
Before attempting any repair, it’s essential to determine the severity of the crack:
Minor Damage: Hairline cracks and small chips are usually less severe. Moderate Damage: Medium-sized cracks that run through the center or around edges can be problematic. Severe Damage: Large cracks, multiple cracks, or cracks that affect the countertop’s structural integrity require professional intervention.
Visual Inspection
To get a clearer picture of the damage, take clear, high-resolution photos of the crack from different angles. This visual documentation will help you understand the full extent of the damage and assist professionals if you decide to seek their help.

DIY Repair Tools and Materials
For minor repairs, you might need the following tools and materials:
Epoxy Resin: Ideal for filling small cracks and gaps. Two-Part Polyurethane Sealant: Suitable for sealing larger cracks. Sandpaper: For smoothing out rough edges after filling cracks. Paint: To cover filler material and match the countertop’s color. Cleaning Supplies: To ensure the surface is clean before applying any repair material.
Safety First
Before starting any repair, ensure the area is well-ventilated. Use gloves and safety glasses to protect yourself from dust and chemicals.
Choosing the Right Repair Method
Based on the type and severity of the crack, here are some repair methods:
Minor Cracks: Use epoxy resin or a polyurethane sealant to fill the crack. Apply the material with a putty knife, smooth it out, and let it cure as per the manufacturer’s instructions. Moderate Cracks: For larger cracks, you may need to cut out the damaged section and replace it with a new piece. This might require professional assistance. Severe Cracks: Severely damaged countertops may need to be replaced altogether. Consult a professional to assess if repair is feasible or if replacement is the best option.

In the next part, we will delve deeper into specific repair techniques, including step-by-step visual guides and tips for achieving a seamless finish.
Step-by-Step Repair Techniques and Maintenance Tips
Once you’ve assessed the damage and chosen the appropriate repair method, it’s time to roll up your sleeves and start the repair process. This section will provide detailed, step-by-step instructions for various repair techniques, along with maintenance tips to prevent future cracks.
Repairing Minor Cracks
1. Clean the Area Start by thoroughly cleaning the area around the crack. Use a mild detergent and a soft cloth to remove any dirt, grease, or debris. Ensure the surface is completely dry before proceeding.
2. Apply Epoxy Resin Most minor cracks can be repaired using epoxy resin. Here’s how to apply it:
Mix the Resin: Follow the manufacturer’s instructions to mix the epoxy resin. Use a spatula to mix until smooth. Apply the Resin: Using a putty knife, apply a thin layer of epoxy resin into the crack. Smooth it out with the knife to ensure a seamless finish. Cure the Resin: Allow the resin to cure as per the manufacturer’s instructions. This usually takes a few hours.
3. Sand and Finish Once the resin is cured, use fine-grit sandpaper to smooth out the filled area. Sand lightly to avoid removing too much material. Finally, apply a matching paint to cover the filler and blend it with the countertop.
Repairing Moderate Cracks
1. Clean and Prepare the Area Clean the area around the crack as described earlier. If the crack is large, you may need to cut out a section of the countertop.
2. Cut Out the Damaged Section Using a fine-grit saw or a oscillating tool, carefully cut out the damaged section. Make clean, straight cuts to ensure a smooth replacement.
3. Measure and Cut Replacement Piece Measure the area you’ve removed and cut a new piece of countertop material to fit. Ensure it’s slightly smaller than the hole to allow for a good bond.
4. Apply Adhesive Apply a strong adhesive, such as polyurethane sealant, around the edges of the hole and on the replacement piece. Spread it evenly with a putty knife.
5. Fit the Replacement Piece Place the replacement piece into the hole and press it firmly to ensure a good bond. Use clamps to hold it in place while the adhesive cures.
6. Smooth and Finish Once the adhesive has cured, remove the clamps and use sandpaper to smooth out the edges. Apply a matching paint to blend the repair seamlessly.
Repairing Severe Cracks
For severely damaged countertops, replacement might be the best option. Here’s how to replace a cracked countertop:
1. Remove the Old Countertop Use a saw or oscillating tool to carefully cut through the damaged section. Remove the old countertop carefully, ensuring you don’t damage the underlying structure.
2. Prepare the Surface Clean and prepare the surface where the new countertop will be installed. Ensure it’s flat and free of debris.
3. Install the New Countertop Place the new countertop into position and secure it with appropriate fasteners. Use a level to ensure it’s properly aligned.
4. Finish the Edges Use caulk or sealant to fill any gaps around the edges and smooth it out. Paint the edges to match the countertop for a seamless look.
Maintenance Tips
To prevent future cracks and prolong the life of your countertop, follow these maintenance tips:
Use Cutting Boards: Always use cutting boards or pads to protect your countertop from knife impacts. Avoid Sharp Objects: Refrain from using sharp objects on the surface, and avoid dragging heavy objects across it. Control Heat: Use trivets or pot holders to protect your countertop from hot pots, pans, and dishes. Regular Cleaning: Clean your countertop regularly with a mild detergent and a soft cloth. Avoid harsh chemicals that can damage the surface. Prompt Repair: Address any minor cracks promptly to prevent them from worsening.
Conclusion
Cracks in kitchen countertops can be a major concern, but with the right approach and tools, they can be effectively repaired. By understanding the type and severity of the crack, using the appropriate repair method, and following maintenance tips, you can restore your kitchen countertop to its former glory. For severe damage, professional help is always an option to ensure the best outcome.
Stay tuned for more tips on kitchen renovation and maintenance in our next article!
By following these detailed steps and tips, you’ll be well-equipped to handle any countertop crack that comes your way, ensuring your kitchen remains a beautiful and functional space.